Welcome to my pages! What I will be posting here is mainly notes I’ve made to myself, cleaned up a bit for public consumption. Mainly focused on Linux and programming.
Latest blog post
I use Debian, BTW
2026-04-18
Introduction
I came into an old Apple MacBook Pro 13 inch mid 2011. It’s a dual core machine, with 4Gb RAM and it came with a 240Gb SSD, which the previous owner wanted to keep, so I swapped it for a 128 Gb SSD I had from my ThinkPad T520. Interestingly, that SSD had Windows 10 on it, and the MacBook actually booted up in Windows when I installed it. I also put in a new battery in the MacBook, the old one was finished. That’s why Apple’s old laptops are getting popular, just like the old ThinkPads are. However, from 2013 and onwards, Apple’s laptops have soldered RAM and SSD onto the motherboard, and the battery is glued in, so there is no way to update or exchange the hardware. Planned obsolescence is a plague in tech these days, and I refuse to bow down to it. All my laptops are from the repairable era, and they run just fine. Apple’s and Microsoft’s OSes keep getting more and more bloated, with all kinds of features, AI and surveillance nobody wants, so once a computer is a few years old, it is no longer powerful enough for their software to run. So people run out and buy new laptops, while the old – perfectly usable one – goes to electronic waste.
Linux to the rescue
Linux runs perfectly well on older hardware. The CPU power required to do most tasks, with the exception of some demanding games, is not extremely demanding. We also used computers in 2010 and we were very happy with them. This MacBook was an amazing machine in 2010 that everybody wanted, and Apple advertised it as the perfect machine for professionals. It still can be. I am actually writing this on the MacBook right now. It is in pretty good condition, and the screen and keyboard is really good. It has 4Gb of RAM which so far has not been a problem but it is possible to upgrade if I want to, I think it can handle 8Gb.
Last year, I installed Arch Linux on an old Mac mini, so this time I decided to install Debian “the hard way”, that is to say, without using an installer. Arch people see it as some kind of rite of passage to the Linux world, but there’s really nothing special about Arch’s manual installation. The popular CachyOS is simply Arch with a graphical installer and styling. You can install most Linux OS’s manually, and Debian developers do it routinely when creating a “clean room” package building environment.
Booting into the Debian Live system
I won’t go into much detail here. I downloaded a live image from Debian’s iso dowload page. I chose the basic image with the the standard text interface. I downloaded the iso image
debian-live-13.4.0-amd64-standard.iso dated 2026-03-14. Its size was 1.9G. I copied the ISO image to my Ventoy disk, which is an old external 2.5 inch HDD, it’s 250Gb so it’s larger than most USB sticks, and actually faster. I then booted up from the Ventoy, and selected the Debian Live 13.4 image. I was sent into a root shell, so now the fun can begin.
The system is rather limited but flexible enough to allow you to install deb packages, and we will need to do that. But first of all: we need network access. If you are going to do this via WiFi like I am, you need to know what WiFi chip the machine has. I happen to know that this MacBook has a Broadcom BCM4322 WiFi card, and that is not supported by Debian (or Ubuntu) out of the box. Fortunately, I have a WiFi dongle for this very purpose that works with built-in Linux drivers, it’s a Ralink RT5370 Wireless Adapter I purchased a few years ago, it cost around 20€. Booting up with that in a USB slot, I had a working network. But of course you need to establish the connection to the network.
Getting a initial network connection
First we need to establish a network connection from the Live image, otherwise we won’t be able to perform the installation. Fortunately, it comes with iwconfig, iw and wpa_supplicant that can be used to activate the WiFi connection. I first ran:
root@debian# iwconfig
I could have installed and used the script program (from the package bsdutils) to record the terminal session but I didn’t think of that before too late. I took some pictures with my phone however. The above command told me there was a device called wlx0092c39cb7e6. I knew I was going to be typing that many times, so I saved it in a variable:
root@debian# DEV=wlx0092c39cb7e6
The iwconfig command also said the device was off and not associated with a network. I now used the ip command to
root@debian# ip link set $DEV up
That command activated the WiFi, but I still had to connect to my local network. To do that I used wpa_supplicant. First we create a file with the SSID and passphrase:
root@debian# wpa_passphrase Kanhavehus2 "myverysecretpassword" > wpa_supplicant.conf
Next, run:
root@debian# wpa_supplicant -i $DEV -c wpa_supplicant.conf -B
The -B flag sends the command in the background. (I did test it without it first to make sure that it worked, Ctrl-C to exit.) I got the message:
Succesfully initalized wpa_supplicant
so now I was connected to my WiFi, but the Live image still doesn’t have an IP address. It has to ask my local router to hand one out, and the system that does that needs to be started:
root@debian# dhcpcd
dhcpcd-10.1.0 starting
dev: loaded udev
wlx0092c39cb7e6: connected to Access point: Kanhavehus2
and a bunch more output, but finally, the Live Debian image got an IP address. I was online!
Next step, create partitions
Until now we have got the Live Debian image connected to the network, but not yet done work on the new Debian system. The next couple of steps we need to do are::
I decided to install the system on a BTRFS filesystem that I also used for the MacMini. Normally on a desktop or a server I prefer to create an LVM volume group, and logical volumes for root, home and backup. But now I only have a 128 Gb SSD and so having a BTRFS system with subvolumes will give me more flexibility with disk usage. On my ThinkPad laptop I am using around 130 Gb on my $HOME and around 70 Gb on root plus the same for backup etc, but with BTRFS I don’t need to decide how to distribute the 120Gb between file systems.
I will use sgdisk to do the partitioning, because it is just a few CLI commands, I can show them here. Normally I would probably use fdisk. But sgdisk is not on the Live image, so it must be installed first:
root@debian# apt install gdisk
First step is use the lsblk command to find the device name of the disk that will be overwritten, in my case it was /dev/sda.
Next step is the SSD device completely, and to do that we use sgdisk with the the -Z flag. It will wipe both the GPT and MBR data structures and make the device ready for partitioning.
root@debian# sgdisk -Z /dev/sda
The next step creates a 250 Mb EFI partition (typecode EF00) on /dev/sda1, an 8 Gb swap partition (typecode 8200) on /dev/sda2 and the rest of the disk is a regular Linux root partition (typecode 8304) on device /dev/sda3. Check out the sgdisk man page if you’re curios about the command line flags. Sgdisk carries them out from left to right, the first flag (-o) clears out partition data and the next flags defines the partitions one by one, starting with the -n 1:0:+250M flag, where the zero means “start where the previous partition ended” and the parameter after that is the size of that partition, in this case 250 Mb.
root@debian# sgdisk -o -n 1:0:+250M -t 1:EF00 -n 2:0:+8G -t 2:8200 -n 3:0:0 -t 3:8304 /dev/sda
So now we have partitions. Next step is to create filesystems on those.
Create filesystems on partitions
Now it’s time to create filesystems on the partitions we just created:
/dev/sda1250 Mb exfat/dev/sda28 Gb swap/dev/sda3111Gb BTRFS
The final partition /dev/sda3 is simply the remaining free space on the 128 Gb SSD.
The EFI partition /dev/sda1 must have an exfat filesystem on it, so we need to install the tools to do:
root@debian# apt install dosfstools
root@debian# mkfs.vfat /dev/sda1
250 Mb for the EFI partition is more than enough, after this install was finished only 2% of that space is in use.
Creating the BTRFS filesystem hierachy
I want to use btrfs subvolumes so the setup becomes a bit involved and confusing. Basically the btrfs main file system can be thought of as an LVM volume group that you put logical volumes on. Having a granular set of subvolumes enables you to use snapshots in a rational way, but contrary to LVM, the subvolumes all share the total device space with the advantages and disadvantages that entails: You can make use of all available disk space, but if one of the subvolumes fills up, like for example your $HOME, the whole system locks up.
The first thing to do is to create all the subvolumes I want. /dev/sda3 is already formatted as a btrfs volume using mkfs.btrfs, so just mount it:
root@debian# mount /dev/sda3 /mnt
Next we need to install the btrfs-tools package as it’s not on the Live Image:
root@debian# apt install btrfs-tools
Next step is to create a BTRFS root volume on /dev/sda3, which in turn will contain the subvolumes we shall create later.
root@debian# mkfs.btrfs -f -L root /dev/sda3
The -L switch merely gives the volume the label `root’. Now create subvolumes:
The next step is to create our BTRFS subvolumes. Let’s create the following:
@is for the Debian root file system (/)@varlogwill be mounted at/var/log. The reason for having this in its own subvolume is because if you later restore a system snapshot, you want to retain the logs so you can figure out what the problems were that caused you to want to restore a snapshot.@varcachewill be mounted at/var/cache. The reason for this having its own subvolume is that it contains a lot of cached data that we don’t want filling up our snapshots.@hometo mount under/home. This will isolate our data from the system partitions so in the worst case we could reinstall Debian without touching the personal data and settings.
Next, create the subvolumes using the btrfs subvolume command. Notice that they are all created on the device /dev/nvme0n1p3. This is the last time we will mount that device like this, after the subvolumes have been created, we mount them always. The only reason for working on the top level device after this is for example to add more subvolumes. It can be confusing, so be careful.
root@debian# mount /dev/sda3 /mnt
root@debian# btrfs subvolume create /mnt/@         # for /
root@debian# btrfs subvolume create /mnt/@varlog   # for /var/log
root@debian# btrfs subvolume create /mnt/@cache    # for /var/cache
root@debian# btrfs subvolume create /mnt/@home     # for /home
The reason to keep /var/log and /var/cache in separate subvolumes is again when restoring / from a snapshot, the system retains logs etc. and in addtion, the files in these areas are constantly updated with information and would take up disk space in the snapshot.
Now, unmount /dev/sda3 and remount the root subvolume (@). We are going to need to write the mount options several times, so to avoid errors, I save them in the variable $options:
root@debian# umount /dev/sda3
root@debian# options="rw,noatime,space_cache=v2,compress=zstd,ssd,discard=async"
Mount the root subvolume, which in BTRFS by convention has the name @. The subvol keyword is also an option so there can be no space between it and the variable $options:
root@debian# mount -o $options,subvol=@ /dev/sda3 /mnt
Create all the mount points needed:
root@debian# mkdir /mnt/home
root@debian# mkdir -p /boot/efi
root@debian# mkdir -p /var/log
root@debian# mkdir -p /var/cache
and mount all the subvolumes:
root@debian# mount /dev/sda3 -o $options,subvol=@ /mnt
root@debian# mount /dev/sda3 -o $options,subvol=@boot /mnt/boot
root@debian# mount /dev/sda3 -o $options,subvol=@home /mnt/home
root@debian# mount /dev/sda3 -o $options,subvol=@varlog /mnt/var/log
root@debian# mount /dev/sda3 -o $options,subvol=@cache /mnt/var/cache
Next, inialize the swap partition /dev/sda2:
root@debian# mkswap /dev/sda2
root@debian# swapon /dev/sda2
Finally mount the EFI partition:
root@debian# mount /dev/sda1 /mnt/boot/efi
Now we have the naked directory structure needed to install a Linux system mounted on /mnt. The directory strucure on /mnt looks something like this:
/mnt
 ├── boot
 │   ├── efi
 ├── home
 ├── var
 │   └── cache
 │   └── log
It has taken a long time to get to this point, and it’s important to get it right. If you make mistakes, you can just start over. Remember that /mnt is what will become / when the installation is finished. Now comes the fun part: Installing Debian on the filesystem.
Create a Debian base system
We need to install the debootstrap package, which as the name says will bootstrap a Debian installation. It is analogous to the pacstrap program from the Arch world:
root@debian# apt install debootstrap
And now we simply run debootstrap to generate a base “forky” Debian system on the /mnt directory hierachy.
root@debian# debootstrap --arch amd64 forky /mnt http://deb.debian.org/debian
This is going to install most packages needed for a running system on our new directory structure, currently at the /mnt mount point.
The new Debian system isn’t finished yet, there are a few more things to do.
Mount pseudo devices
Our new /mnt hiearchy needs access to the system services provided by the Linux kernel in the form of pseudo devices.
root@debian# mount -t proc /proc /mnt/proc
root@debian# mount -t sysfs /sys /mnt/sys
root@debian# mount --rbind /dev /mnt/dev
Generate fstab
To help with the next step, let’s install the package arch-install-scripts, which contains a couple of helper scripts from Arch Linux that make things a lot easier. If you haven’t already, install it by:
root@debian# apt install arch-install-scripts
We are going to use genfstab from the package we installed above to generate the /etc/fstab file of the new system:
root@debian# genfstab -U /mnt > /mnt/etc/fstab
Before you proceed, check /mnt/etc/fstab and verify it’s correct. You may have to remove some pseudo devices, in other words, fstab should only contain the actual file systems we created and mounted above, including the swap partition.
Prepare the chroot environment
Now we can ‘chroot’ (change root) into the new system. We are using again a script from the Arch distribution, because it convieniently sets up a bunch of other things behind the scenes, such as mounting the pseudo devices proc, sys, etc.
root@debian# chroot /mnt
After chroot
Until now we have had the prompt root@debian# which comes from the Debian Live Image we are running under. But from now on, the system we will be working on is the permanent system being installed on the MacBook. For the sake of this writeup, I will use the prompt forky# but it didn’t appear like that when I did it. However it will make it clear that we are now working with the new Debian “forky” system.
forky# cd /
Set the hostname, I will call my MacBook Pro from 2011 “zombie” because it has arisen from the dead:
forky# echo "zombie" > /etc/hostname
We also need to define the hostname in /etc/hosts, from here it will be recognized by the local network, thanks to mDNS (avahi_daemon) that will be installed later.
forky# cat << EOF > /etc/hosts
127.0.0.1 localhost
::1       localhost
127.0.1.1 zombie
EOF
At this point we are running the system as if it had booted from our new system, and we can start installing packages and configuring the system.
Set timezone and locale
For setting up timezone, we can run dpkg-reconfigure:
forky# dpkg-reconfigure tzdata
For setting up locales, we can run dkpg-reconfigure again.
forky# apt install locales
forky# dpkg-reconfigure locales
I usually choose en_GB.UTF8 as the default locale because it has 24h time and use period for the decimal point, which is what I prefer.
Set the correct time and date
I noticed that the date was completely off, so I had to set it:
forky# date
For some reason the date on the MacBook was completely wrong, but it needs to be at least approximately correct, otherwise apt will think its certificates aren’t valid yet. Therefore I had to set i manually:
forky# date --set "2026-04-17 15:52:00Z'
Add a user account
Create a user account for me and set a password:
forky# useradd mok --uid 1026 -Gsudo,users -m
forky# passwd mok
and I want paswordless access to sudo:
forky# echo "mok ALL = NOPASSWD: ALL" >> /etc/sudoers.d/mok
Configure the apt repository
Now we add the non-free-firmware repo to /etc/apt/sources.list, so it looks like this:
deb http://deb.debian.org/debian forky main non-free-firmware
and update the cache:
forky# apt update
The non-free repository is necessary in order to get all firmware, which you will need if a component of your system needs it. Later, when the system boots up, I will add the contrib and non-free components too, but we don’t need them right now.
Install Linux
Now we can install software in the new system. First of all install Linux. It is not a part of the base system installed by debootstrap, and at the moment we are running as a guest machine on the Debian Live Image. The root filesystem is the one we have made, but we won’t be running our own kernel until we reboot, and we can’t do that yet.
The amd64 image is appropriate for 64 bit Intel or AMD CPUs, and this will install the latest version of the kernel (currently 6.19.11+deb14):
forky# apt install linux-image-amd64
Install a network driver
I need to install a network driver for the WiFi adapter, which on the MacBook 13" 2011 is a Broadcom Inc. BCM4322, for which there’s an open source driver (b43) in the repo:
forky# apt install firmware-linux
forky# apt install firmware-b43-installer
forky# apt install efibootmgr
Install grub
Next install grub:
forky# apt install grub-efi-amd64
Install GRUB configuration for the UEFI booting modes, but first we need to mount efivars before installing grub, otherwise grub-install fails with a message.
forky# mount -t efivarfs none /sys/firmware/efi/efivars
Choosing grub as the bootloader, all that we need to do is to run a grub-install.
forky# grub-install --target=x86_64-efi --efi-directory=/boot/efi
Then generate grub configs:
forky# update-grub
Because root is on a BTRFS subvolume, in the file /etc/default/grub add the following to the variable GRUB_CMDLINE_LINUX_DEFAULT
rootfstype=btrfs
Otherwise you get a kernel panic when rebooting into the new system.
Install more packages
Next step is to install some more packages important for the functioning of the system.
forky# apt install dhcpcd5 network-manager zsh
forky# apt install sudo vim fastfetch
Finally: install the desktop environment
The final step before booting into the new system is to install a desktop environment. I choose Cinnamon because it is a very elegant, simple and user friendly desktop. The easiest way is to use tasksel, which will allow you to choose between a desktop or laptop system, and to install various graphical interfaces.
forky# apt install tasksel
I then chose to install:
- Debian Desktop Environment
- Cinnamon
- laptop
forky# tasksel install desktop
forky# tasksel install cinnamon-desktop
forky# tasksel install laptop
Tasksel also has an interactive mode if it’s run without arguments. The system told me it had to download and install 1601 packages, so I went for a walk.
Booting up in the new system
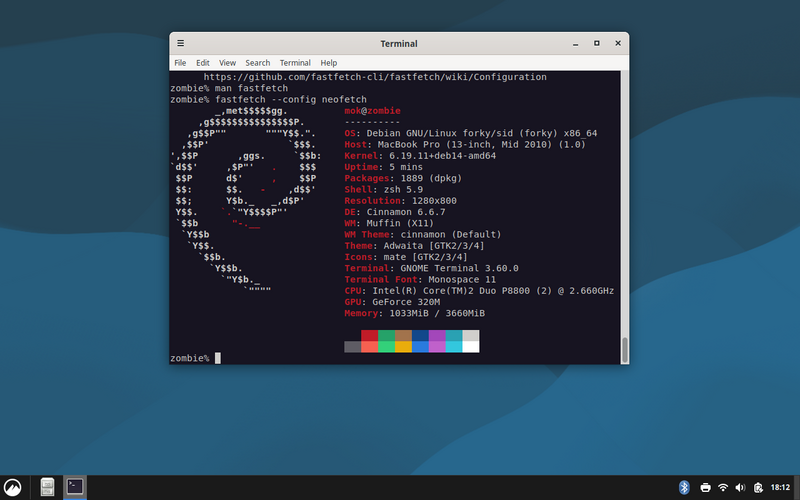
When I came home from my walk an hour later, it was finished. I rebooted the machine, removed the Ventoy external USB disk, and after a short while I was greeted by Cinnamon’s login screen. I logged on, and the MacBook was connected to the network, all I had to do was to enter the password to my access point.
The system was using between 900 and 1100 Mb of memory, meaning Cinnamon is not heavy at all. This MacBook Pro 13 inch runs fine with just 4Gb of RAM, so I may not have to upgrade it.
So now I can proudly say: “I run Debian, BTW”.
Related blog posts
- Arch Linux on a USB flash drive
- Lightweight Debian installation
- Install Debian from a running Arch or Gentoo system
- Installing Debian GNU/Linux from a Unix/Linux System (from Debian’s installation guide.)
- Remotely Installing a Fully-Encrypted Debian install
- Debian installation (debootstrap)